

Starting an online store can feel confusing in the beginning. There are so many tools, plugins, and platforms available that beginners often get lost. If you are someone who wants to make the process easier, then BookingPress can be a great choice. It is a simple yet powerful WordPress plugin that helps you manage bookings, services, and even sell products online.
In this guide, we will explain in simple words how to use BookingPress to launch your online store step by step. By the end, you will understand how to set it up and start selling your services or products.
What is BookingPress?
BookingPress is a WordPress plugin made for businesses that provide services and need online booking. For example, salons, doctors, gyms, tutors, consultants, and other service providers can use it. But it is not just limited to services — you can also use it for selling products, managing payments, and creating a complete online store.
The best part is that you don’t need to be a technical expert to use it. The plugin is user-friendly and beginner-friendly.
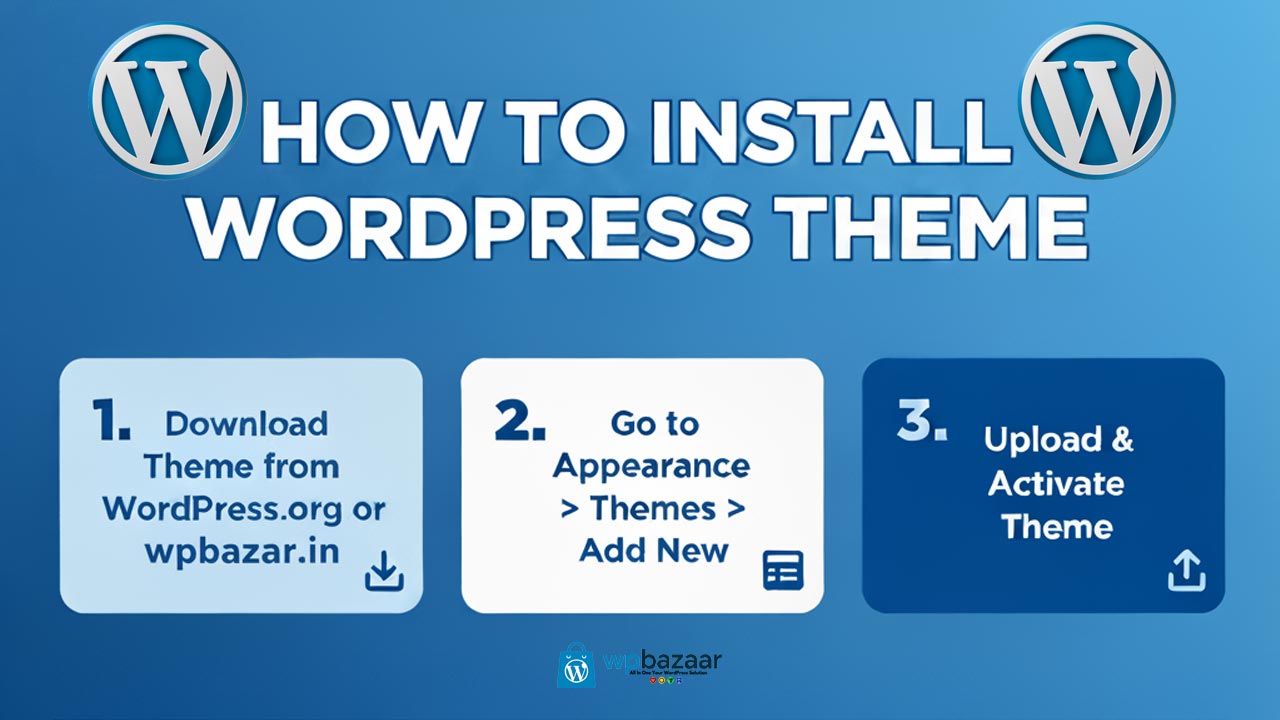
Step 1: Install WordPress and BookingPress
Before you start using BookingPress, you need a WordPress website. Many hosting providers give you one-click WordPress installation, so setting it up is easy.
- Buy a domain name (example: www.yourstore.com).
- Buy web hosting that supports WordPress.
- Install WordPress with one click.
Now that your website is ready, you can install BookingPress:
- Go to your WordPress dashboard.
- Click on Plugins > Add New.
- Search for BookingPress.
- Click Install Now and then Activate.
Step 2: Basic Setup
Once BookingPress is installed, you will see it on your WordPress menu. The setup wizard will guide you through basic settings. Here’s what you need to do:
- Business Info: Enter your store or service name, logo, working hours, and holidays.
- Currency & Time Zone: Select the currency you want to accept and the correct time zone.
- Services or Products: Add the services or items you want to sell. For example, haircut, consultation, online class, or physical products.
Step 3: Add Services or Products
In BookingPress, you can add different services or categories. If you run a salon, you can add “Haircut,” “Facial,” “Massage,” etc. If you run an online store, you can add your products with price and description.
Steps:
- Go to Services in the plugin.
- Click Add Service.
- Fill in the name, price, duration (if it’s a service), and image.
- Save changes.
You can also create categories to organize everything neatly.
Step 4: Enable Online Payments
One of the most important features of BookingPress is that it supports online payments. You can easily connect PayPal, Stripe, or local payment gateways.
Steps:
- Go to Payments Settings.
- Choose your payment gateway (PayPal, Stripe, etc.).
- Enter your payment details (email or API keys).
- Save changes.
This way, your customers can pay online while booking or buying from your store.
Step 5: Customize Your Booking Form
BookingPress allows you to create beautiful booking forms that customers can fill out.
You can:
- Add custom fields like name, email, phone, address, etc.
- Change colors and styles to match your website.
- Add multiple steps (service selection, date & time, personal details, payment).
This form can be placed anywhere on your website using a shortcode.
Step 6: Manage Appointments and Orders
BookingPress makes it easy to see all your orders or bookings in one place. You can:
- View upcoming appointments.
- Approve or cancel bookings.
- Send email or SMS reminders to customers.
- Track completed and pending orders.
This keeps everything organized without extra effort.
Step 7: Launch and Promote Your Store
Once everything is set up, your online store is ready to go live. But just creating it is not enough — you also need to promote it.
Here are some tips:
- Share your store link on social media (Facebook, Instagram, WhatsApp).
- Offer discounts for first-time buyers.
- Write blogs on your website to get more visitors.
- Ask happy customers to leave reviews.
Why Choose BookingPress?
- Easy to use: Even beginners can set it up without coding.
- All-in-one solution: Bookings, payments, services, products — everything in one plugin.
- Customizable: Change the design and style as per your brand.
- Affordable: You don’t need to pay for expensive software.
Final Words
Launching an online store no longer requires technical knowledge or big budgets. With the help of BookingPress, you can create a professional website where customers can book services or buy products with just a few clicks.
Follow the steps in this guide install WordPress, set up BookingPress, add services or products, enable payments, and customize your booking form. Once done, your online store will be ready for customers worldwide.
If you are a beginner, BookingPress is the perfect tool to start your journey into the online business world.
Note: All photos and videos have been taken from Google or YouTube, so if you have any problem with the photo then mail us.
If you find any problem in this post or want to remove this post, then contact us: CONTACT US
🚀 We Recommend Hostinger
📢 Exclusive Offer 🎁
If you purchase Hostinger hosting through our link and contact us via WhatsApp or Email,
you will receive one Premium Website Template absolutely free (100% Free of Cost).


[…] How to Install the WooCommerce Plugin on WordPress A Simple Step-by-Step Guide […]