Starting an online store is exciting. You get to share your products with people all over the world. But to run a store smoothly, you need tools that help you collect customer details, process orders, and manage payments. One of the easiest tools for this is Fluent Forms, a WordPress plugin that makes building forms quick and simple.
In this guide, we will explain what Fluent Forms is, why it is useful, and how you can use it step by step to launch your online store.
What is Fluent Forms?
Fluent Forms is a WordPress plugin that lets you create forms without writing any code. With it, you can design contact forms, order forms, payment forms, registration forms, and more. It has a drag-and-drop builder, so you just pick the fields you need and arrange them the way you like.
For an online store, Fluent Forms is helpful because you can:
- Collect customer information (like name, email, address).
- Take product orders.
- Accept payments through PayPal, Stripe, and other gateways.
- Manage customer queries easily.
Why Use Fluent Forms for an Online Store?
There are many plugins for WordPress, but Fluent Forms is popular for a few good reasons:
- Ease of Use – No coding required, just drag and drop.
- Speed – It is lightweight and does not slow down your site.
- Integration – Works with WooCommerce, PayPal, Stripe, Mailchimp, and more.
- Customization – You can design your forms to match your store’s look.
- Affordable – It has a free version with useful features, and a pro version with advanced tools.
Step 1: Install Fluent Forms
To begin, you need to install Fluent Forms on your WordPress site:
- Log in to your WordPress dashboard.
- Go to Plugins > Add New.
- Search for Fluent Forms.
- Click Install Now, then Activate.
Once activated, you will see a Fluent Forms tab in your dashboard menu.
Step 2: Create a New Form
Now that Fluent Forms is installed, you can create your first form.
- Go to Fluent Forms > New Form.
- Choose from pre-built templates (like contact form, order form, subscription form) or start with a blank form.
- Use the drag-and-drop builder to add fields such as:
- Name
- Email
- Phone Number
- Address
- Product Selection
- Quantity
- Payment Method
- Name
You can rearrange the fields, change labels, and add instructions for your customers.
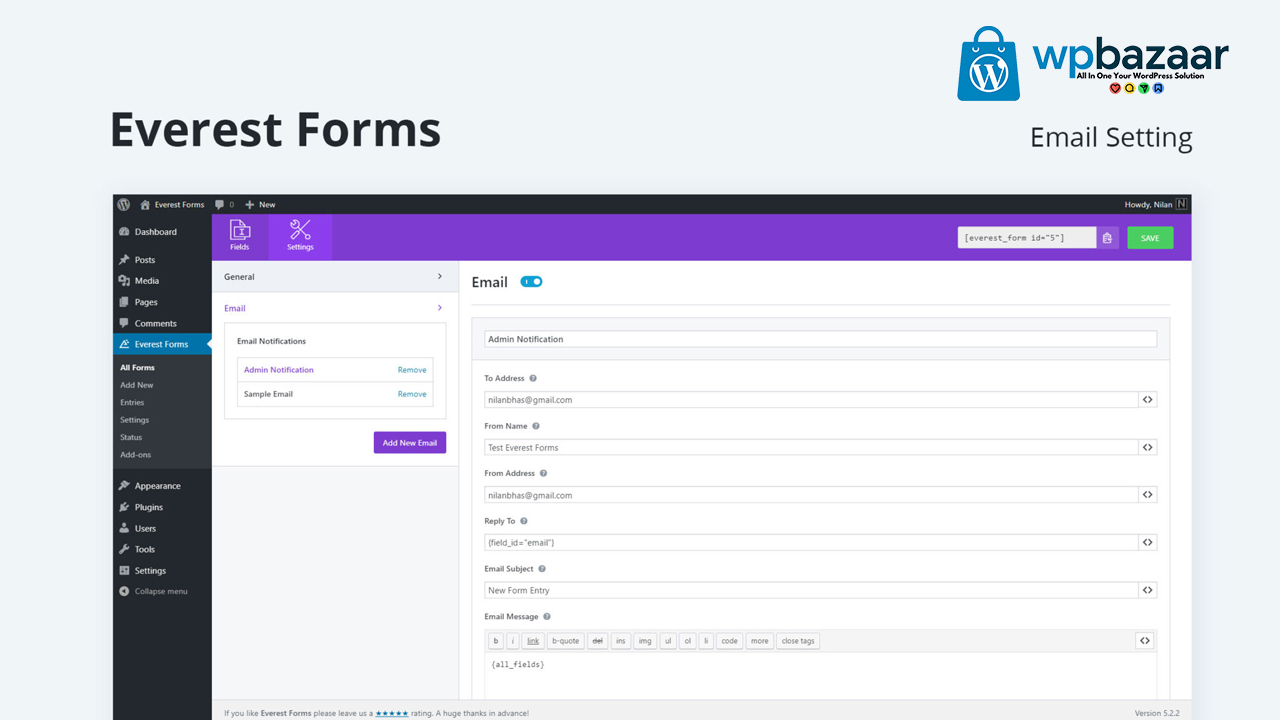
Step 3: Set Up Payments
An online store must accept payments. Fluent Forms supports payment gateways like PayPal and Stripe.
- Go to your form settings.
- Click on Payment Settings.
- Enable your chosen gateway (e.g., PayPal or Stripe).
- Enter your account details.
Now, when customers fill out your form, they can pay directly.
Step 4: Customize Form Settings
To make your form user-friendly, set up notifications and confirmations:
- Email Notifications – You can send an automatic email to yourself and your customer when an order is placed.
- Confirmation Messages – Show a thank-you message after a customer completes the form.
- Redirects – Send customers to another page (like “Order Received”) after form submission.
Step 5: Add the Form to Your Store Page
Once your form is ready, you need to display it on your online store.
- Open the page or post where you want the form to appear.
- Click Add Block in the WordPress editor.
- Choose Fluent Forms.
- Select your form from the list.
Your order form will now appear on your site, ready for customers to use.
Step 6: Test Your Store
Before launching your store, test the form:
- Fill it out as if you were a customer.
- Check if emails and payment processing work.
- Make sure the form looks good on both desktop and mobile.
If everything works smoothly, you are ready to go live.
Tips for Success
- Keep it Simple – Don’t add too many fields; only ask for necessary details.
- Offer Multiple Payments – Give options like PayPal, card payments, and bank transfers.
- Secure Your Store – Use SSL and security plugins to protect customer data.
- Track Orders – Use Fluent Forms’ entries section to see all orders in one place.
- Upgrade if Needed – Start with the free version and move to Pro as your business grows.
Conclusion
Launching an online store may feel difficult, but with tools like Fluent Forms, it becomes much easier. In just a few steps, you can build order forms, accept payments, and manage customers—all without needing technical skills. If you are new to online selling, start simple. Create a basic order form, test it, and then slowly add more features as your store grows. With Fluent Forms, you have everything you need to start your e-commerce journey successfully
Note: All photos and videos have been taken from Google or YouTube, so if you have any problem with the photo then mail us.
If you find any problem in this post or want to remove this post, then contact us: CONTACT US
🚀 We Recommend Hostinger
📢 Exclusive Offer 🎁
If you purchase Hostinger hosting through our link and contact us via WhatsApp or Email,
you will receive one Premium Website Template absolutely free (100% Free of Cost).