
If you want to start your own online store using WordPress, then WooCommerce is the best and most popular plugin to help you. With WooCommerce, you can sell physical products, digital downloads, or even services. The best part? It’s free and easy to use. In this article, we will show you in simple words how to install the WooCommerce plugin on your WordPress website.
What is WooCommerce?
WooCommerce is a free plugin for WordPress that lets you turn your website into an online shop. It comes with many features like:
- Adding products
- Taking payments
- Managing orders
- Shipping options
- Coupons and more
It is trusted by millions of users worldwide and is beginner-friendly.
Things You Need Before Installing WooCommerce
Before installing WooCommerce, make sure you have:
- A WordPress website
- Admin access to your website
- A good internet connection
Optional but helpful:
- A theme that supports WooCommerce
- A few product images and details ready
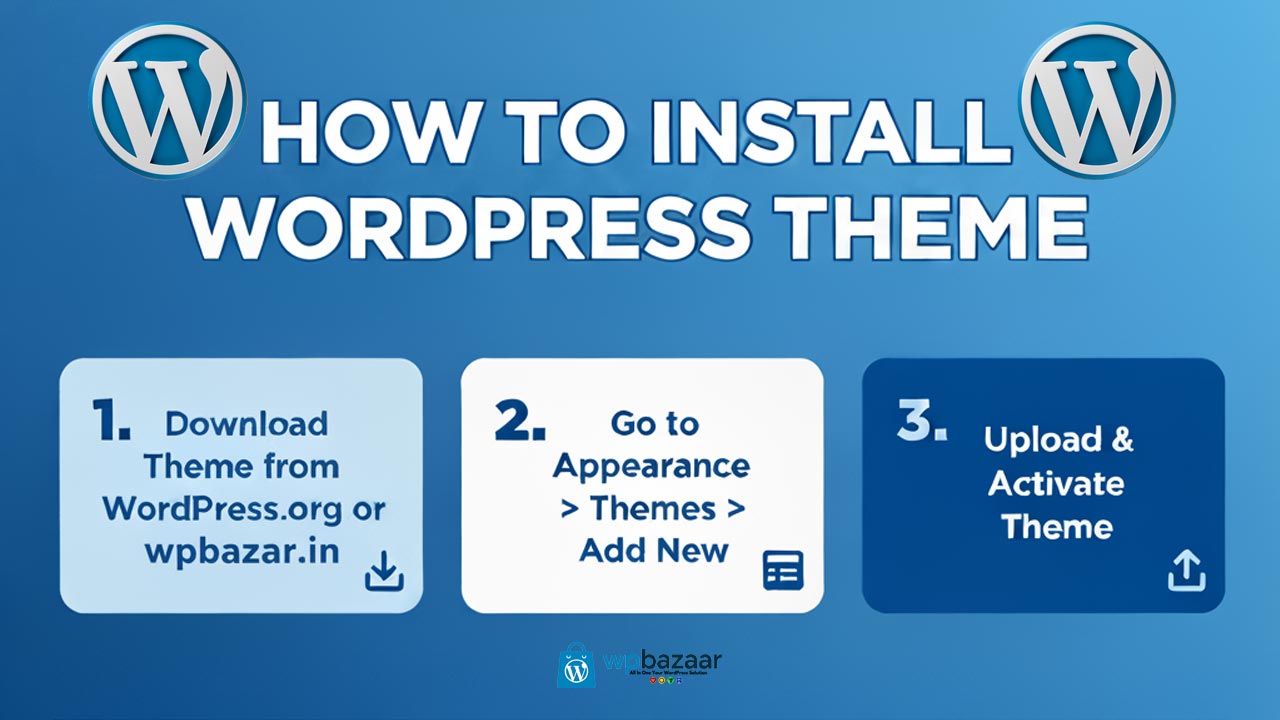
Step-by-Step: How to Install WooCommerce Plugin on WordPress
Step 1: Log in to Your WordPress Dashboard
First, go to your website and log in to your WordPress admin panel. The URL usually looks like this:
bash
CopyEdit
yourwebsite.com/wp-admin
Enter your username and password to access your dashboard.
Step 2: Go to Plugins > Add New
On the left side of the dashboard, you will see a menu. Hover over “Plugins” and click on “Add New”.
This is where you can add new plugins to your site.
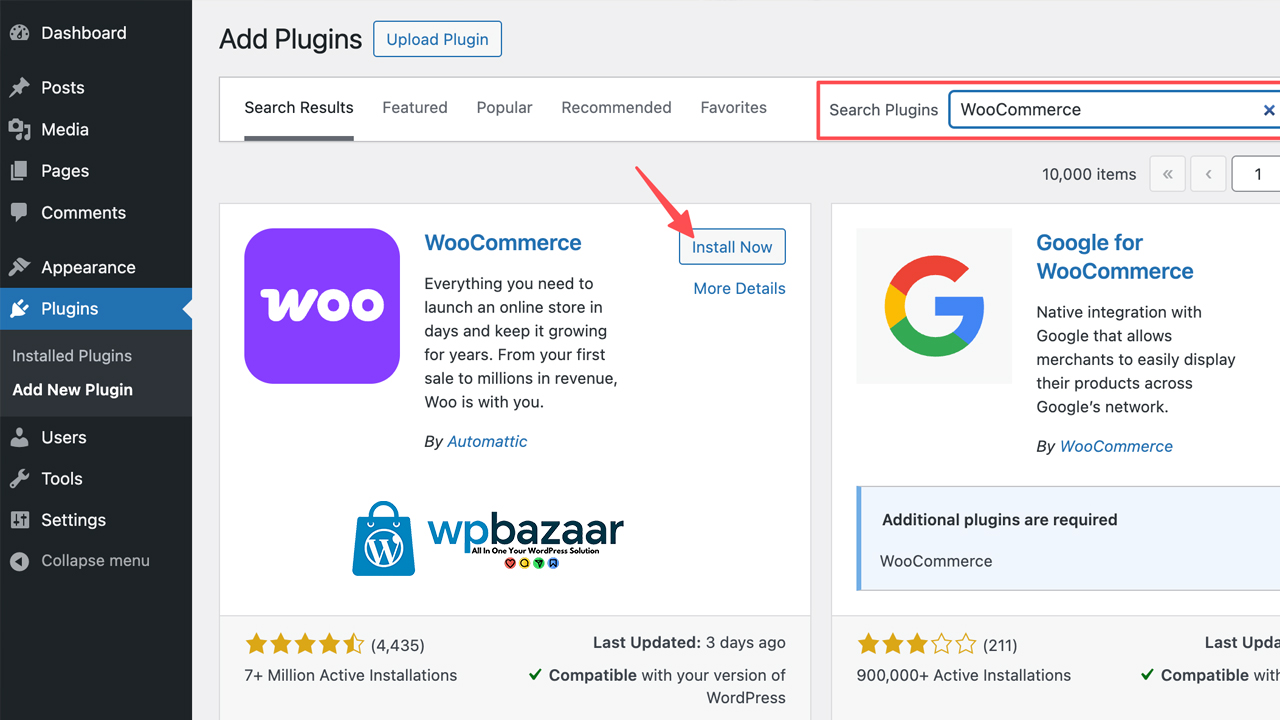
Step 3: Search for WooCommerce
In the search bar on the top right corner, type WooCommerce.
You will see the WooCommerce plugin by Automattic (the company behind WordPress). It usually has millions of active installations and high ratings.
Step 4: Click “Install Now”
Once you find WooCommerce, click the “Install Now” button next to it. The button will change to “Installing…” and then “Activate”.
Step 5: Activate the Plugin
After installation is complete, click on the “Activate” button.
Once activated, WooCommerce will start the setup wizard to help you configure your store.
WooCommerce Setup Wizard Easy Configuration
After activation, WooCommerce will take you through a few simple setup steps:
Step 1: Store Details
Add your address, country, city, and zip code.
Step 2: Industry
Choose the industry that matches your store (e.g., fashion, electronics, health).
Step 3: Product Type
Choose what type of products you’ll sell: physical, digital, subscriptions, etc.
Step 4: Business Details
Tell WooCommerce how many products you plan to list and if you are already selling elsewhere.
Step 5: Theme
WooCommerce will suggest a few themes. You can stick with your current theme or choose another one.
Adding Your First Product
Once your store is set up, WooCommerce will take you to the dashboard. You can now add your first product by:
- Clicking on Products > Add New
- Entering the product name, description, price, and images
- Choosing the product category and tags
- Clicking Publish
That’s it! Your product is now live.
Important WooCommerce Features
- Product Management – Easily add, edit, or remove products
- Payment Gateways – Accept payments via PayPal, Stripe, or direct bank transfer
- Shipping Options – Set shipping zones, rates, and delivery methods
- Coupons & Discounts – Create coupon codes to attract buyers
- Reports – Track your sales, orders, and customers
Tips for Using WooCommerce
- Use a WooCommerce-compatible theme for better performance and layout
- Install security plugins like Wordfence to protect your store
- Keep backups of your website using plugins like UpdraftPlus
- Update regularly to get new features and stay secure
Final Words
Installing WooCommerce on your WordPress website is simple and fast. You don’t need to be a tech expert. Just follow the steps above and you’ll have your own online shop ready in minutes. Whether you’re selling clothes, books, or digital art, WooCommerce gives you all the tools you need to manage your business online.
Note: All photos and videos have been taken from Google or YouTube, so if you have any problem with the photo then mail us.
If you find any problem in this post or want to remove this post, then contact us: CONTACT US
🚀 We Recommend Hostinger
📢 Exclusive Offer 🎁
If you purchase Hostinger hosting through our link and contact us via WhatsApp or Email,
you will receive one Premium Website Template absolutely free (100% Free of Cost).


3 thoughts on “How to Install the WooCommerce Plugin on WordPress A Simple Step-by-Step Guide”